In this tutorial, I’ll take you
through the basics of using Adobe InDesign.
This demonstration will be done using Version CS4 and I’m going to work
on Windows XP. For this tutorial, you
are going to create a booklet with 4 pages that has some text and various
formatting done to it.
I’m not going to give lecture on
the program. I will only take you
through the few steps that can help you familiarize yourself with the program
so you can build your own project later on.
This tutorial is only a practical guide to help you accomplish
certain common tasks.
The next set of paragraphs will take you through the rest of the basic
processes that you can use to create almost any page layout for your project.
I’m confident you will learn
something from this tutorial after going through it. If you have further comments or queries, please
do not hesitate to leave a comment after this post or visit my website for more free tutorials via URL http://www.artech.com.pg/pages/freeTutes.php
.
Furthermore, I do also have some
detailed booklets to help you know more about InDesign which can also improve
your layout design knowledge. Visit my website to get more information if interested.
OVERVIEW:
In this tutorial you are going
to set up your project, which is an InDesign Document and insert some data into
it then later do some basic formatting.
The document you’re going to create would be an A5 size document. This document would be a small booklet/ card
with only 4 pages. Because the document has
less number of pages, it would be stapled once printed. Consequently, we have to use an A4 size paper
to arrange this setting. The document
would be a 2-sides folded document so the actual number of pages on the
document setting in InDesign would be 2 pages of A4 size. We would split those two pages to give us a
total of 4 pages, left and right sides of the cover/ back and the inside pages.
1. Creating the Document
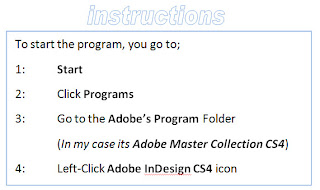
Start the program through the Start Menu;

|
2
|
|
1
|
|
31
|
|
4
|
Once you complete the 4th Step above, you would see a screen similar to the one below;
The first time Adobe InDesign starts, you would see the welcome screen (above) showing up in the center of the screen. This window allows you to access some of the common tasks of the program such as Opening the recently used documents, creating projects, participating in online discussions, or to seek further help. You are going to use this window to set up your document.
Don't worry if you don't have the welcome screen. You can bring it in from the Help menu. Go to Help Menu > Welcome Screen.
2. Creating the Document
Once that is set, click OK and you should return to the welcome screen again. If you've closed the welcome screen, don't worry, just got to File > New to bring the New Document dialogue box or Help > Welcome screen to bring up the welcome screen.
3. Adjusting the Page Setting
Adjust
your New Document settings to match the once below. The changes are outlined in Red
4. Setting the Layers Palette
Open the Layers palette (shortcut = F7) and create two layers. Rename the two layers to Texts and Images respectively as shown below. Make sure Text layer is on top.
5. Setting the Layers Palette
Let's now set the Master layout of your design. Switch to the Pages Palette by clicking pages palette or by pressing shortcut F12 key on your keyboard.
Make sure you're in Master page (A-Master). You'll begin by setting up some background graphics for the page numbers and the header. User the pen tool to come up with some shapes on both the top and bottom sections of your page. Remember, this is like a template that would be applied to all the pages where you specify A-Master to be applied.
There are two pages on this document. We cannot think of anything with two pages other than a Greetings or Season's card so let's assume that we're going to create a sort of greetings card. The first page would be the Cover page and the second would be the inside of the card.
The first and foremost thing is to understand how the pages are arranged. There are two pages created in InDesign (2 A4 sheets) but each page would have 2 sides. The first page would be the Cover (front and back) and the second page would be the inside of the card (left and right sides). When printed, there would be only 1 sheet of A4 paper but both sides would be printed.
To understand this clearly, let's look at the dummy below. Notice how the pages are arranged so that you know exactly where you can design respective pages.
6. Adding Text Box
Now get the Type tool and draw a box on the right side of page 1 as shown below.
7. Adding Images
To add images, you should first deactivate any active tool. Simply select the selection tool then click anywhere on the white space outside the work area. This is just to make sure you don't have any object selected.
Now do the following to insert an image;
We'll take a break now and on the next part (Part 2) of this training, I will show you the remaining process.


No comments:
Post a Comment