
A quick rundown on the few steps involved in creating a basic
interactive interface with buttons activated. Very simple to start you
off. Take some minutes to complete the exercise to gain the basics.
This tutorial will take you through various steps in setting up your stage, using various tools, modifying the properties panels, timeline, layers, testing moving and creating symbols. This is Part 1 and it will take you through creating a working button with three states, the Up, Down and Over states activated.
Visit http://www.artech.com.pg/ for more stuff or request other advance stuff via online request form there.

1. Start a new Project

2. Under the General Tab, select Flash (Action Script 2)

3. Document should be created then. Few important panels named above for you to take note of.

4. Adjust settings accordingly

5. In the timeline panel (image above left), right click Layer 1, go to Properties and type "main"as the name of this layer (above right)

6. In the timeline panel, use the new layer icon (above left) to create two more layers. Follow step 5 to rename the two layers to buttons and actions respectively. (image above right)

7. Go to the tools panel and select the rectangle tool (1). From the properties panel (2), under Fill and Stroke, click the fill color palette (4) and select a grey color (5).

8. Still in properties panel, under Fill and Stroke, disable the color for the stroke (above)

IMPORTANT:
Before you start drawing the rectangle, confirm that you have selected the main layer on your timeline panel to draw the shape on.

9. Draw a rectangle across the bottom of the stage as shown above.

10. In the tools panel (above left), select the pen tool and create additional points (above).

11. Go back to the tools panel, select the Subselection Tool and select the two points at the top-right ( image below).
Simply drag with the Subselection tool from left to right as shown below to highlight both points.

Once they’re selected, use the down arrow down key on your keyboard to move the points down. The idea here is to create some kind of placement for the buttons which you are going to create next. Your new shape should look like the one below. Feel free to modify later on.


13. Create a button. Under tools panel, select the rectangle tool (1). Then go to properties panel, under Rectangle options (2) type 25 (3). Under fill and stroke select black stroke (4) and a lighter yellow color for the fill (5). You can always go back later and change the colors. Also, set the stroke strength to 1 (6)

14. Now go to the stage (see step 3 for stage id) and draw a shape like the one above. This will be your button.

14. Now go to the stage (see step 3 for stage id) and draw a shape like the one above. This will be your button.


Type “home” for the Name and select Button for the Type as shown on the left then click OK.

16. On the main stage, double click the button to get inside. There you will add text to the button.

Once inside, create another layer for your text. Take note of the layer options. You would see four names and these are known as the button states (up, over, down) plus the hotspot (hit)

Select the first layer “Layer 1” then right click on each of the frames (just under over, down, hit states) and click insert keyframe.
This will allow you to insert keyframes so you can do necessary changes to the shape & color of the button.

You should have something similar to the one on the above. You can then go to each frame and adjust the properties and that’s what you will do next.

17. Now select keyframe under the over state (1), then go to the stage and click the inside (2) of the button (fill) to select, then go to the properties panel and change the fill color to orange. (3) . Do the same for the other state “Down”. Use maybe a maroon color for the down state. Leave the hit with the set color. This is only the hotspot to target the states. You should now have three colors for the 3 states as show below.


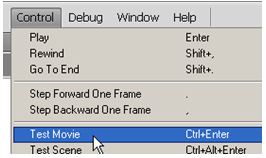
Test the movie by pressing Ctrl + Enter. If you are still used to the old fashion way of going by every mouse move, I mean using the long process, you can find the same function under the Control Menu > Test Movie

Well, I hope you’ve learnt something new in this tutorial. Please, don’t forget to post comments.

Well, I hope you’ve learnt something new in this tutorial. Please, don’t forget to post comments.
No comments:
Post a Comment